Many people enjoy having a chimney in their house but do not realize that it needs cleaning more than once a year. Ideally, you have to clean your chimney every 50-70 burns. But you can keep it simple by including chimney sweeping in your fall and spring cleanings.
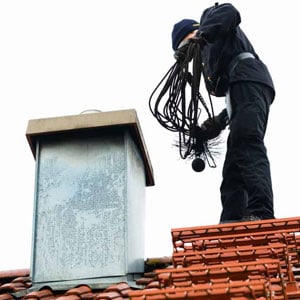
Sweeping the chimney is not as difficult as you may think. Granted, you will need several cleaning tools, but they are a very small investment for something that can go a long way. Keep in mind that chimney sweeping requires you to climb the roof to clean the flue. If you think this is too taxing, hire a professional chimney sweeper. But if you are sure you can do it by yourself then keep on reading for five easy steps on sweeping your chimney.
1) Check if It’s Time
 To tell when your chimney needs cleaning, you can always do the soot test and see how much it has build up. All you have to do is to open the damper, point the flashlight on the flue and brush it with the poker tip. If your poker is coated for about 1/8 inch, and soot is matte black with powdery texture, then you can sweep your chimney right away. But if the soot is much thicker and has a glossy look, then you have to call a professional to clean it. The glossy layer is the creosote that needs professional expertise to handle.
2) Get all the equipment ready
 You only need several types of brushes and a long handle to sweep your chimney. But if you want to do it thoroughly, then you have to prepare several other items like a plastic cover, canvas tarp, vacuum, and protection gears like a face mask and goggles. You need to measure your chimney width to get the right size for your flue brush. It has to fit for maximum cleansing. The same goes for the brush rod. Choose one that you can reach the whole length of the flue. You also need a smaller and adjustable, noodle brush to clean the fire chamber.
3) Prepare the space
The fireplace is often placed in either the library or the family room. Either way, you have furniture to consider before start cleaning. That’s why you need to cover the fireplace with plastic and canvas wrap. Make a little space to put your vacuum tip-in. Then seal every opening with duct tape.
4) Start Sweeping
Climb to the roof and take off the chimney cap if you have one. Start brushing your way down using the large flue brush. It is okay to go slow to make sure that you brush every inch. Take a break once in a while to check your progress with the flashlight. And don’t forget to check the vacuum bag so it won’t get clogged. When it’s ready, climb up again and repeat. Keep sweeping until you reach the firebox.
5) Some Final Brushes
 When you are done sweeping the whole flue, then it’s time to clean the fire chamber and firebox. Make an opening on the plastic cover and insert the flexible brush. Start sweeping your fire chamber and let the vacuum inhale everything. Swap the noodle brush with a long-handled brush to clean the remnants. Turn off your vacuum and carefully remove the plastic and canvas cover. Sometimes you may need to hand vacuum the fire chamber as an extra measure.
While it is true that you can save hundreds of dollars by sweeping your chimney, it doesn’t hurt to call in a professional once in a while to check your chimney condition. They will assess your chimney to see if there’s any leaking or any other safety issue that you need to be aware of.

