One of the greatest means to guarantee to have pollution-free air in your home is to clean your air vents. The air ducts in your house can hold millions of particles of dust, hair, filth, pollen, spider webs, and other allergens. It may seem like an overwhelming task at first but its a relatively simple task, once you get the hang of it. So if you’re watching your wallet and have a diligent inner self, you can try duct cleaning yourself.
Good-to-know tips before you begin
Here are a couple of things you need to know before you start a do-it-yourself duct cleaning project:
- DIY duct cleaning isn’t stress-free. If you’re not familiar with this kind of labor, it can take quite a long amount of time to get the job done.
- Do it yourself air duct cleaning isn’t for the nervous and easily nauseated. You might unearth mold, animal and insect manures and even a dead rodent!
- DIY duct cleaning can possibly make your ducts considerably cleaner and lessen dust.
- If you choose to do this by yourself, you most probably won’t have access to the high-powered vacuums and rotary brushes that duct cleaning businesses have. Without these specialized apparatus, you should not expect the same results as from professional duct cleaning services.
Here’s what you’ll need:

- Heavy-duty gloves, a dust mask, and goggles. Put these on while cleaning to protect yourself.
- A screwdriver that’s should be compatible with the screws on your registers and return-air grille plates.
- Paper towels or rags.
- A vacuum with a long hose.
- A stiff-bristle cleaning brush with a long handle.
What you need to do:
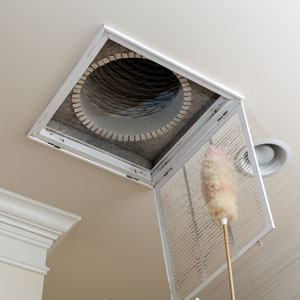
- Take out screws from air duct covers and return-air grill plates.
- Temporarily cover your supply air registers with paper towels or cloths. Lift the unscrewed register slightly up and tuck a towel under it to keep the towel in place. This will stop dust from entering your rooms as you clean.
- Turn your thermostat to the “fan on” position. The fan will help in the passage of the dust when cleaning. Switch the heat and cool mode to off. If your older thermostat does not have a “fan-only” setting, increase the temperature.
- Loosen the dust in the ducts and clean the grates thoroughly.
- Expose and lift one supply register one at a time. Use the vacuum to suck up all the dirt blown out by the fan. Here’s where the long hose will come in handy; use it to go as deep as you can to draw out the dust. This is important because you may already have mold and mildew growing inside the air ducts
- Clean the return-air registers one-by-one with your brush and vacuum. Also, clean each duct covers and grill plate before reattaching. If they’re very filthy, use soap and water to make them shine.
- Replace dirty HVAC air filters.
What if you find mold during your DIY duct cleaning?
Have the mold you’ve located tested to verify because you would need the help of a professional if you have a mold problem. Reputable HVAC duct cleaning companies would have the expertise and necessary equipment to remove dangerous mold and their tools can reach places that your house vacuum cannot.
If you find mold in your insulation, call an HVAC professional to replace it. As of the present time, there has not been a proven effective way yet to clean mold from insulation.
Risks of DIY Duct Cleaning:
- DUCT DAMAGE
Doing duct cleaning by yourself runs the risk of tearing your ducts, especially if you have flex ducts that are made from thin plastic and are easily damaged. Great care should also be given to prevent crushing flex ducts or knocking the plastic tubes off any support brackets. Something as simple as accidentally poking a small hole in your ductwork, can reduce airflow in your home and make your HVAC system less effective. It will also increase your utility bills.
- LESS EFFECTIVE CLEANING
While you may be able to make noticeable improvements with your air quality with a DIY duct cleaning, your efforts still won’t be as effective as professional cleaning. Your lack of proper equipment and training will hinder your efficiency.

